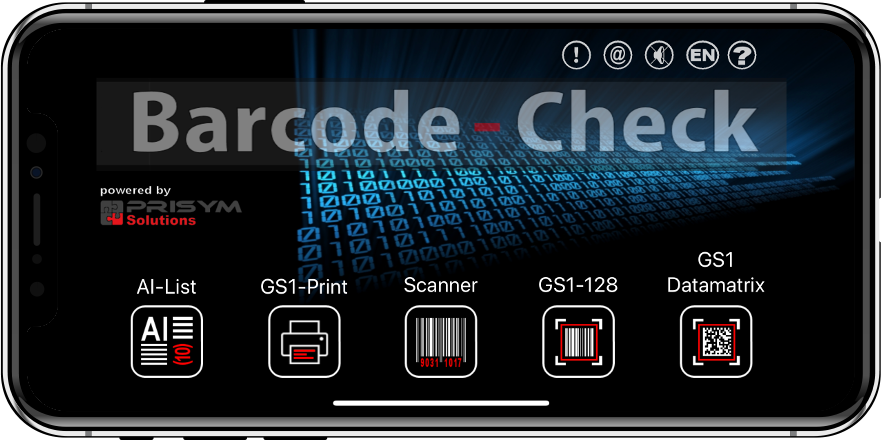
In the start screen of the Barcode-Check you have access to the 5 main functions and the settings.
The identifier list shows important information, specifications and restrictions for all valid identifiers.
The printing function does not print barcodes, but provides a way to create and print GS1-compliant labels.
The barcode scanner allows you to read barcodes that are not checked against any specification. It just shows barcode type and content.
With EAN-128 you'll get reading and checking of the normal EAN 128 or GS1 128 barcodes with the evaluation according to GS1 and Email Reporting.
For the evaluation of an EAN/GS1 Datamatrix 2D barcode you use the last function. Again with email reporting and detailed information.
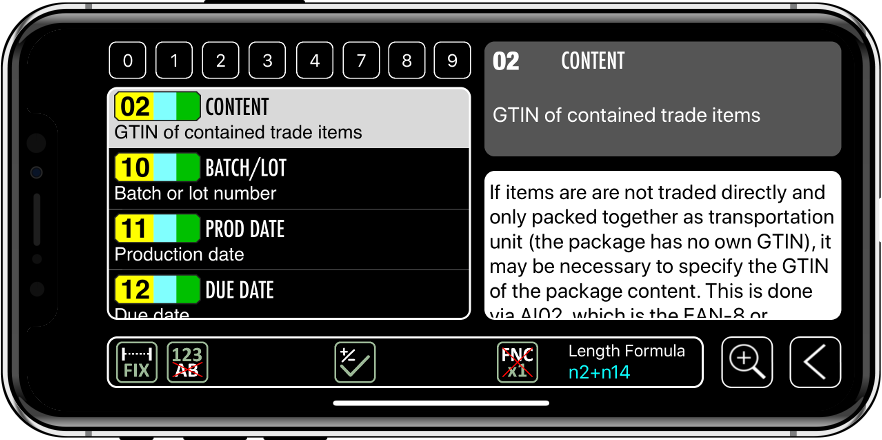
All application identifiers have a numeric ID with up to 4 digits and a short name in English. In addition to this information, you will also see the full name with details and warnings. Also its main parameters are listed.
If an identifier has a variable length, e.g. a lot number, a FNC separator must be used so that a scanner knows where the identifier ends. There are also some fixed length identifiers where a FNC separator is required. You can also see here if the identifier may be numeric or alphanumeric. Some numeric identifiers require a check digit after modulo 10 which is checked. Identifiers that should no longer be used are considered to be discontinued are marked. The length formula n2 + n14 indicates identifier length and data length. You can see these in the detail view more clearly...
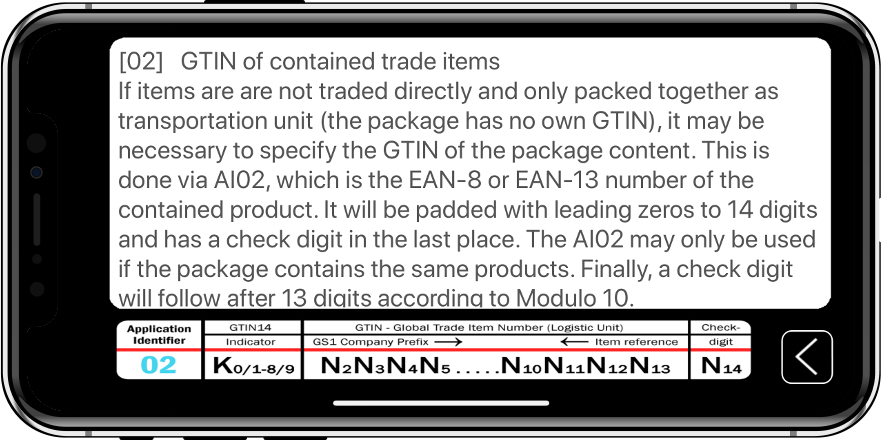
The detail view for the identifier gives you the info text and also the image slightly bigger. If you tap on the graphic below, it will be displayed in large instead of the text above.
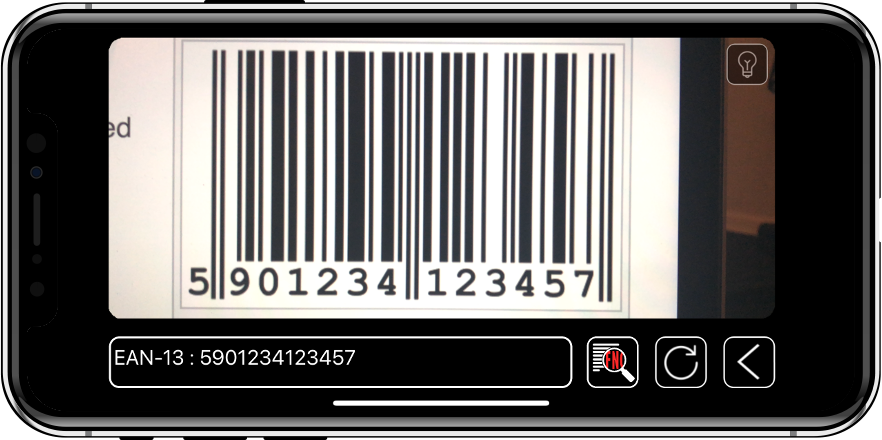
To offer scanning of non-GS1 barcodes, we have integrated a normal barcode scanner function. This feature reads the following barcodes: UPC-A, UPC-E, EAN 8, EAN 13, Code 39, Code 93, ITF 2/5, Code 128, Codabar, RSS-14, Data Matrix and QR Code.
Except for the possibility to check the data, you will find the same elements as with the GS1 scanners here. It will show the barcode type and the read content. With the EAN 13, you will also see the country from which the product comes from. With the restart function you can restart the barcode reader. At the top right you can activate the lighting, if available. Be sure to have only one barcode in the reading area and wait for the iPhone to focus.
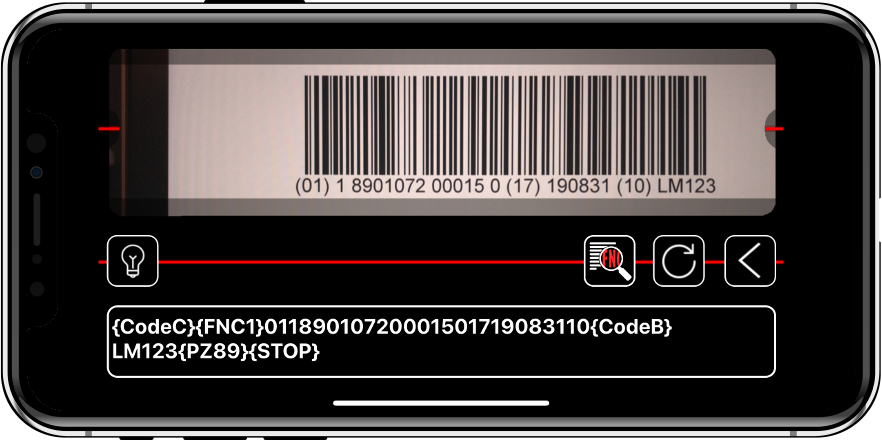
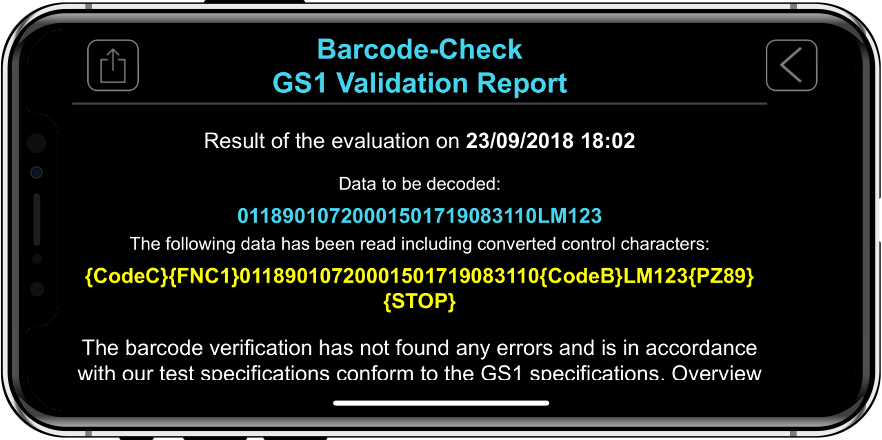
Since the GS1 / EAN 128 barcode uses Code-128 as symbology, control characters may also be included in the content. These are control characters to switch the character sets as well as FNC separators. Character set A also allows the use of control characters such as tabulator or newline. All these characters are not displayed by normal scanners in the scan output. With our scanner, these control characters are displayed in curly brackets.
If available, you can also activate the lighting in the iPhone and restart the barcode scanner. In addition, the button for GS1 check is active after successful reading the barcode. If you use them, the scanner unit will be disabled so you need to return to the main menu to rescan.
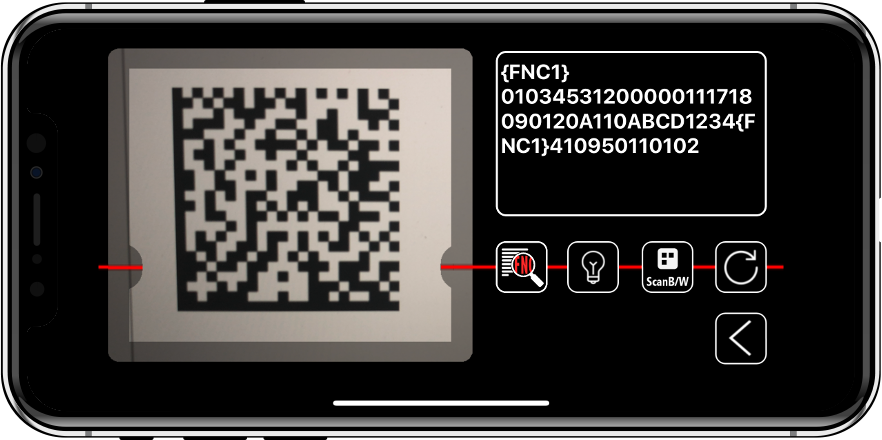
The GS1/EAN Datamatrix is first choice when GS1 data needs to be printed on small products. With its high readability rate plus option to read partially destroyed barcode and the very small print area an optimal 2D code. However, it must be read with camera systems, so the existing laser scanners can not be used.
This picture shows very well that the scanning of the barcode is already finished, before the iPhone could sharply focus the picture. The Datamatrix also contains control characters, which are displayed in curly brackets. The familiar buttons for restarting the barcode scanner, enabling the lighting and starting the GS1 evaluation are also available here.
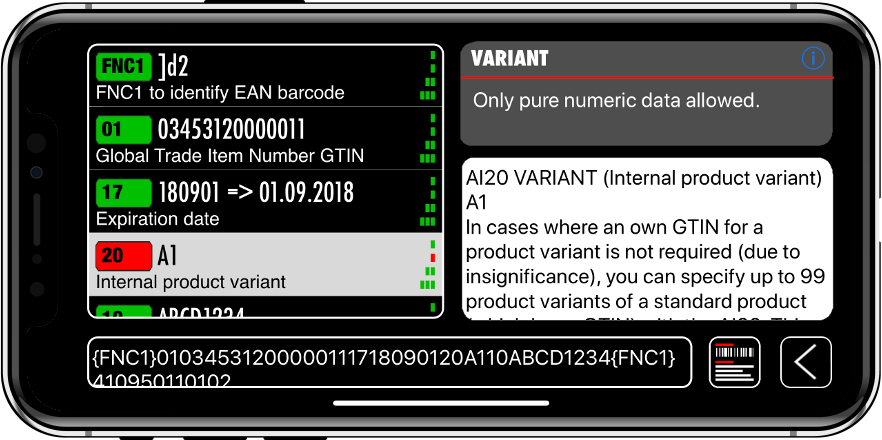
To perform a GS1 check, the content of the scanned data are searched for GS1 identifiers. Through the GS1 guidelines, we know how long an identifier and its data are. This also applies to identifiers with variable length, since at the end there must be a FNC1 delimiter. But in any case there must be a leading FNC1 character that a Code-128 becomes the EAN/GS1 128 (this also applies to the Datamatrix). Regardless of this, we will continue to check for errors in order to display all errors if possible.
In this example it does not look so good. Here is an incorrect date of manufacture indicated in the barcode. The quantity specification with the identifier 30 is marked in yellow because the separator was a GS instead of the FNC1.
Depending on the identifier we check the following points and the result can be sent with the report function.
# Is the delimiter available for variable lengths
# Is a correct data length used
# Does data contain only valid characters
# Is a possibly required check digit also valid
# If there is an indicator, evaluate it
# For dates: has a valid date been set
# Currency and country codes are set correctly
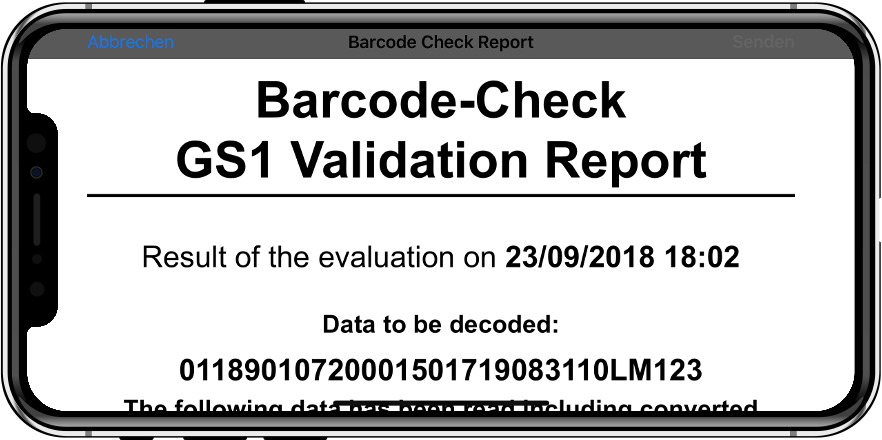
With the reporting function you can send a report with all results of the analysis as an email. The report is created in the email as an HTML report with images and also generated as a PDF and the mail attached as an attachment. Also note that the address of the receiver can be specified in the program settings.